Setup Your Free Portfolio With A Blog Using GitHub Pages

This article is part of a series showing you how to quickly and freely build and host your own Jekyll blog on GitHub Pages. This series will also cover more advanced topics like adding a comment system directly in our code using Staticman and adding privacy-friendly but still free analytics using Umami.
I divided the tutorial into several parts:
- Introduction
- Setting Up <- you are here
- Create Content
- Customize Display
- Commenting System - Part 1
- Commenting System - Part 2
- Analytics
Now, let’s see how we can set up and deploy our website.
Create your GitHub Pages repository
To deploy your website using GitHub Pages, you need to create a new public repository using the following convention for the name: <username>.github.io.
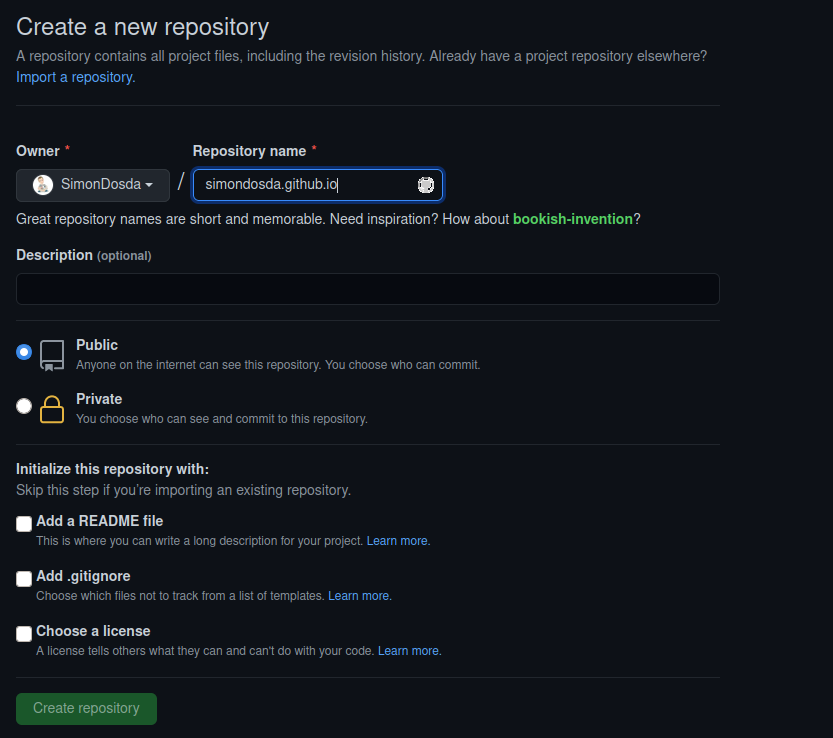
Once you have done this, the content of your repository will be deployed on https://<username>.github.io. You can try adding an index.html file at the root of your repository with “Hello World” or anything you fancy written in it to check everything works as expected.
Note that you can deploy a website from any repository, but in this case, the associated URL will be https://<username>.github.io/<repository-name>. This feature is very convenient to deploy documentation of your projects, for instance.
For this tutorial, I will use a specific repository called gp-blog (for Github Pages Blog), which will therefore deploy at https://simondosda.github.io/gp-blog, but you most probably want to deploy your portfolio at the root folder.
Now that our git repository is ready, let’s see how to set up Jekyll in it.
Create your Jekyll static website
Jekyll is a Ruby Gem, so make sure you have all the prerequisites installed to use it. You can find their list and the procedure to install them on your OS at https://jekyllrb.com/docs/installation/.
Once you have done this, install Jekyll and Bundler gems.
gem install jekyll bundler
We can now initialize our Jekyll project in the repository we just created with the following command.
jekyll new .
Then, open the Gemfile file and follow the instruction to deploy on GitHub Pages by commenting the gem "jekyll" line and uncommenting the gem "github-pages" one.
# This will help ensure the proper Jekyll version is running.
# Happy Jekylling!
# gem "jekyll", "~> 4.2.0"
# If you want to use GitHub Pages, remove the "gem "jekyll"" above and
# uncomment the line below. To upgrade, run `bundle update github-pages`.
gem "github-pages", "~> 214", group: :jekyll_plugins
For the version (here 214), you can find the latest version here.
You can then type the command bundle update to install your dependencies and serve your website locally with the command bundle exec jekyll serve --livereload.
Your new blog is now served on localhost:4000. As you can see, it needs some customization.
Edit the global configuration
We can now start customizing our new blog. The first thing to do is to update the _config.yml file. There you can edit your blog title, its description, your email address, and GitHub username.
You can also enter your Twitter username or comment the corresponding line if you don’t have any.
You can also add the property show_excerpts: true to display posts’ excerpts on the home page.
More anecdotical, you can change the permalink generation for pages with the permalink attribute. I like to use a less nested structure like the following.
permalink: /:collection/:year-:month-:day-:title:output_ext
Even though we use the --livereload option, it will not consider changes done in the _config.yml file. You need to kill your server and relaunch it, and you should see your changes appear in your browser.
If everything is ok, you can commit your changes and push them.
Note that you can edit the branch which deploys your website on your GitHub repository in Settings → Pages → Source.
Here we are. We now have our blog backbone up and running!
You can find the code for this part here.
Our next step is now to add some content to our website.
Comments
Suggestion
Hi,
Thanks for your tutorial.
I guess the command for creating a project should be
Leave a Comment